Hey Welcome to the Studio Tuesday Reruns!
This is the page where we’ll post previous recordings of our Studio Tuesday events.
Missed an evening, wanted to go back and do it again, want to share the fun night with a friend, not a problem you can direct them here or to the shortcut KarenBiko.com/reruns.
**Note – The links to any products or supplies for the classes do include affiliate links. These products pay us a tiny little commission which helps us pay for the resources to continue and grow the events (paid Zoom account, website hosting, event supplies, etc). Thank you in advance for your support!
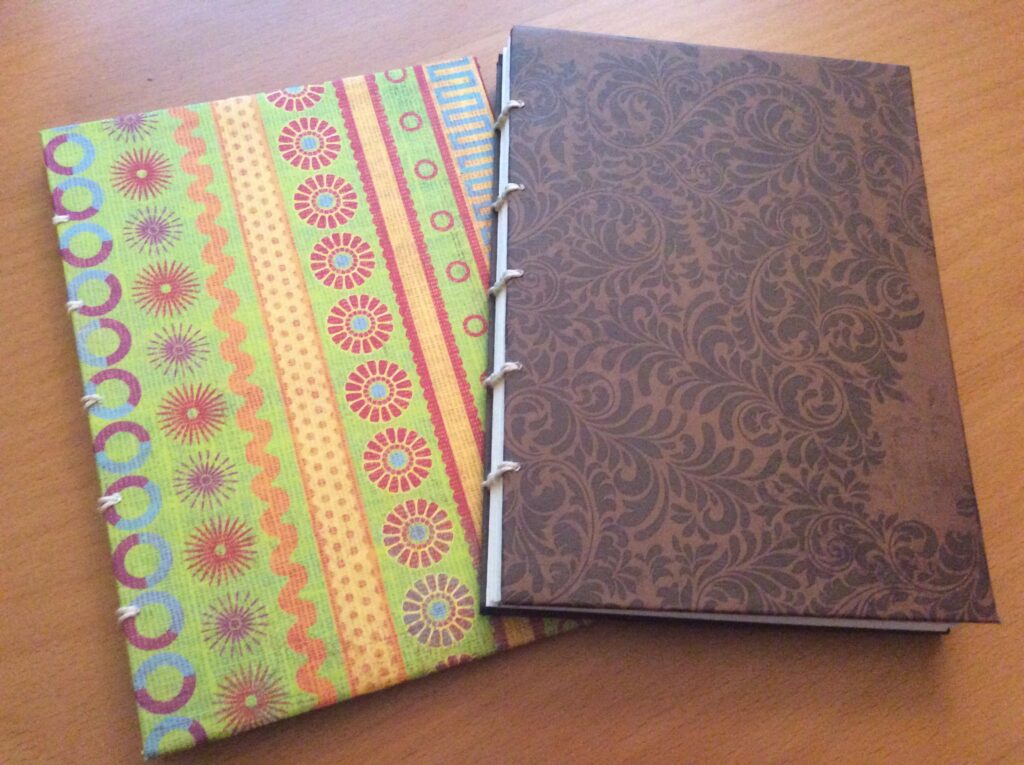
Studio Tuesday – September 12th – Book Binding
We are going to give this a try over our zoom meeting. I love making these little journals, or sketchbooks.
They make lovely hand-made gifts, but there is a bit of sewing to be done. I will demo the entire project on Tuesday, but it might take you a bit longer if you want to take time to let glue dry. Come and join in and have fun with me. If you have any questions about supplies needed please don’t hesitate to text me and I will get you on the right track.
Supplies Needed
- Two covers (stiff board) 5 ½” x 7 ½”
- 15 Sheets of paper for in book 10 ½” x 7 ¼” – will be folded
- Scrap book papers (two, one for cover, one for back) 10” x 7”
- String (fairly strong) – if you have beeswax that’s optional
- Glue Stick
- Needle (something that you can use with your string)
- Rulers, T-Pin and cork board, scissors, pencil.
Have a sketchbook handy for notes and inspirations!
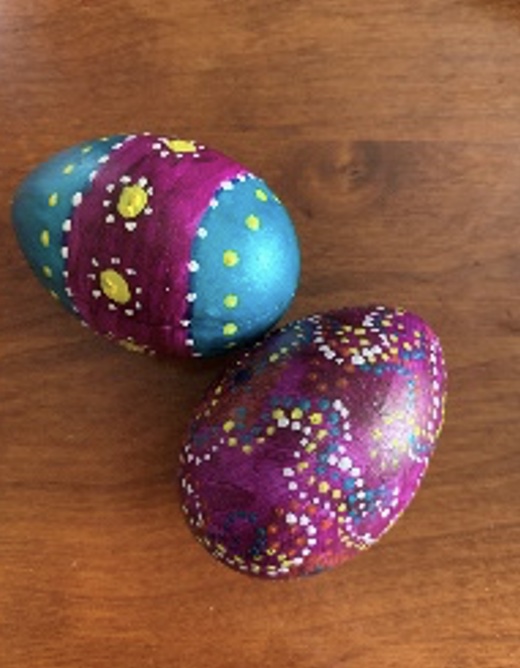
Studio Tuesday – April 11th – Painted Easter Eggs
I cheated. I went to Michaels and bought some fake eggs. But they paint up real nice. You can use real eggs if you want to go through the whole blowing the egg out. Granted I’m doing this after Easter, but you can always come back early next year and re-watch the video I’ll record!
Supplies: paint, brushes, tools to make lines and dots, some form of egg
Studio Tuesday – April 4th – Articulated Feathers
Today we’ll be working on a project I call Articulated Feathers. We use old ribbons (think participation ribbons…) that we trim and work into to get these cool feather effects.
Supplies
Supplies: Green Ribbons (or any colour ribbon you can find), Wire, Gesso (or white paint for a base coat). Paint, scissors, needle and thread, paint brushes or tools to make dots or marks on the feathers
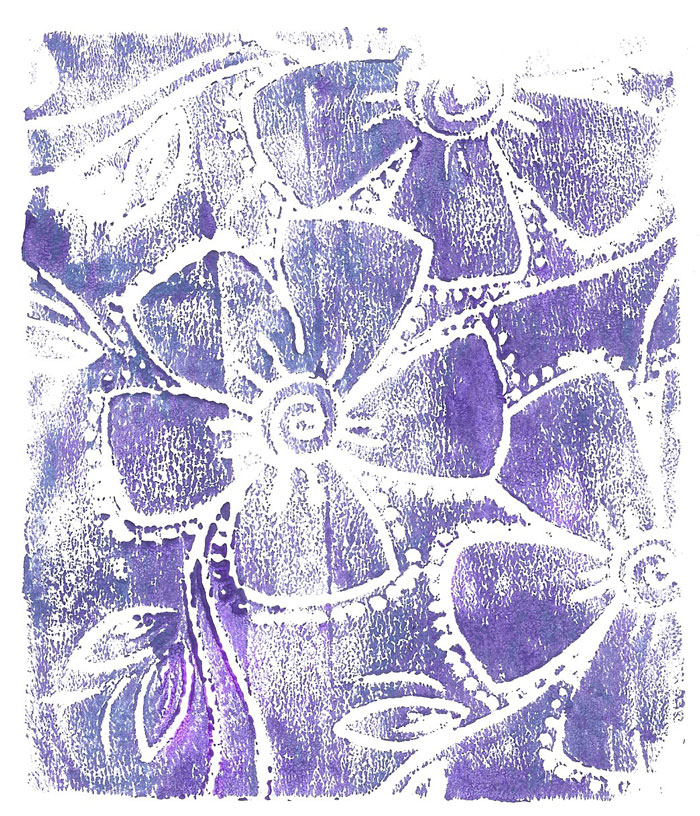
Studio Tuesday – January 31st – Styro Monoprints
Hey all, sorry for the late notice.
This coming week we will be doing Styro Monoprints.
Supplies Needed:
Couple of Styrofoam sheets (like egg carton or meat tray – flat)
Dull pencil
Paint
Brayer (if you have one)
Paper or sketchbook….alternately you could also do your prints right on card stock.
Pencil crayons, pens
See you Tuesday!
Karen
Have a sketchbook handy for notes and inspirations!
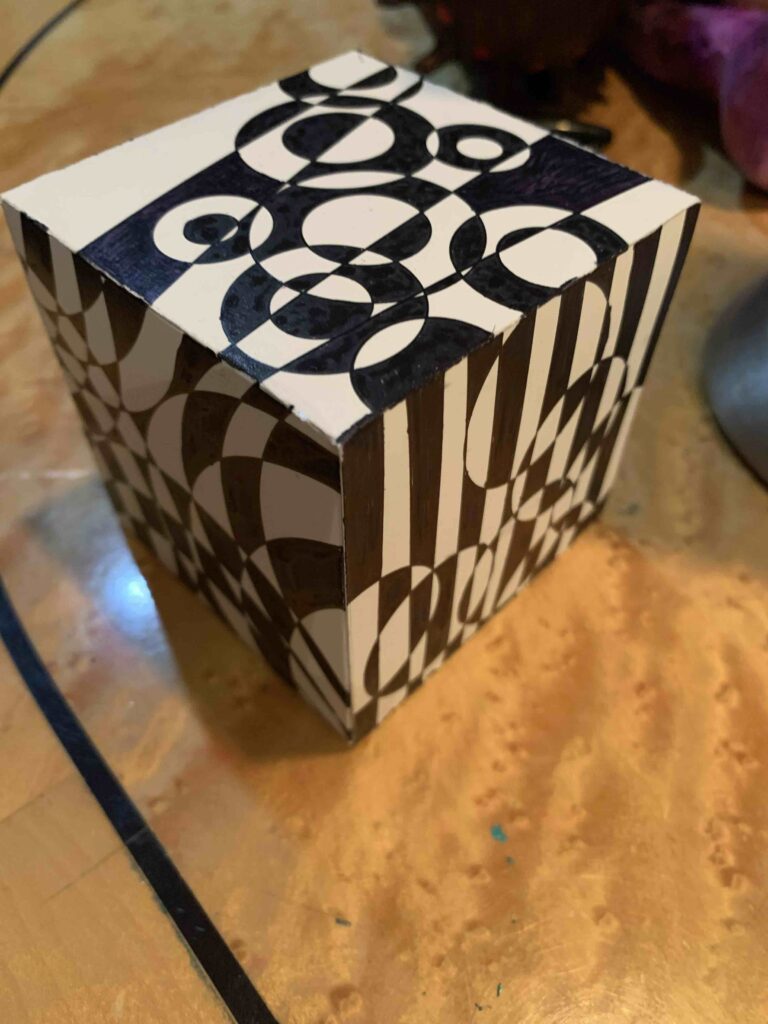
Studio Tuesday – January 24th – Optical Art Cubes
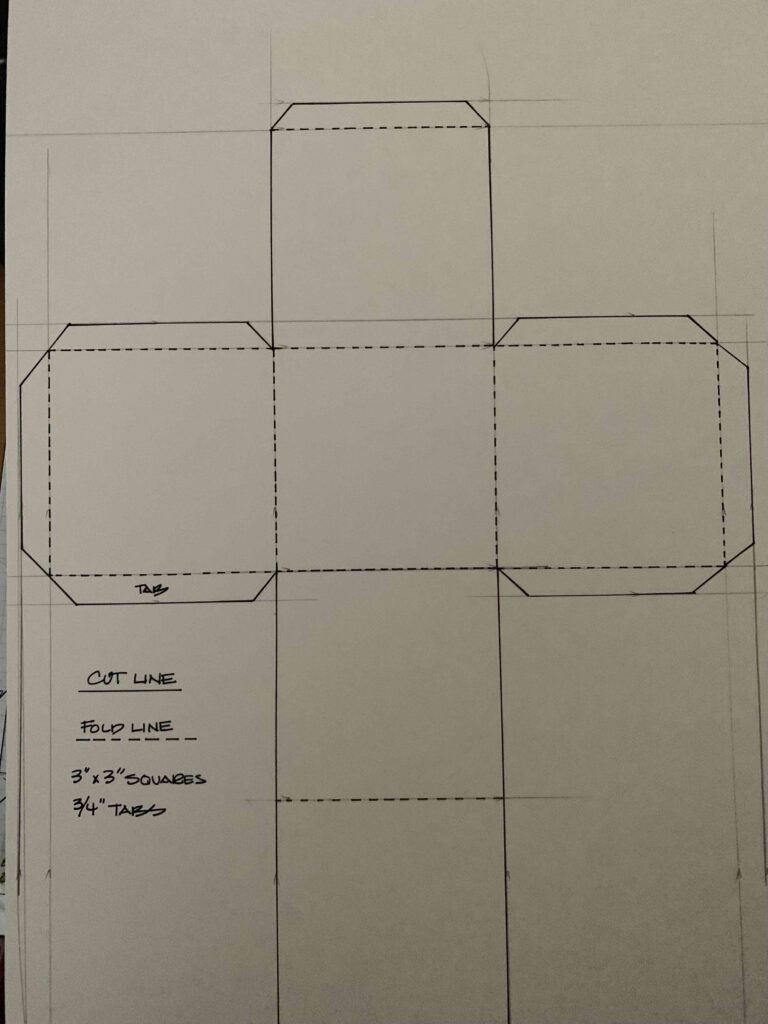
This little project will likely leave you with some homework as it takes a bit of time.
Supplies Needed:
Cube template cut (see attached drawing to make your cube)- it will be glued together once the drawing is done.
Black marker (or you can use a colour if you like)
Rulers, circle templates (jar lids work)
Glue stick
Studio Tuesday – January 17th – Blind Contour Drawing
Hello everybody!
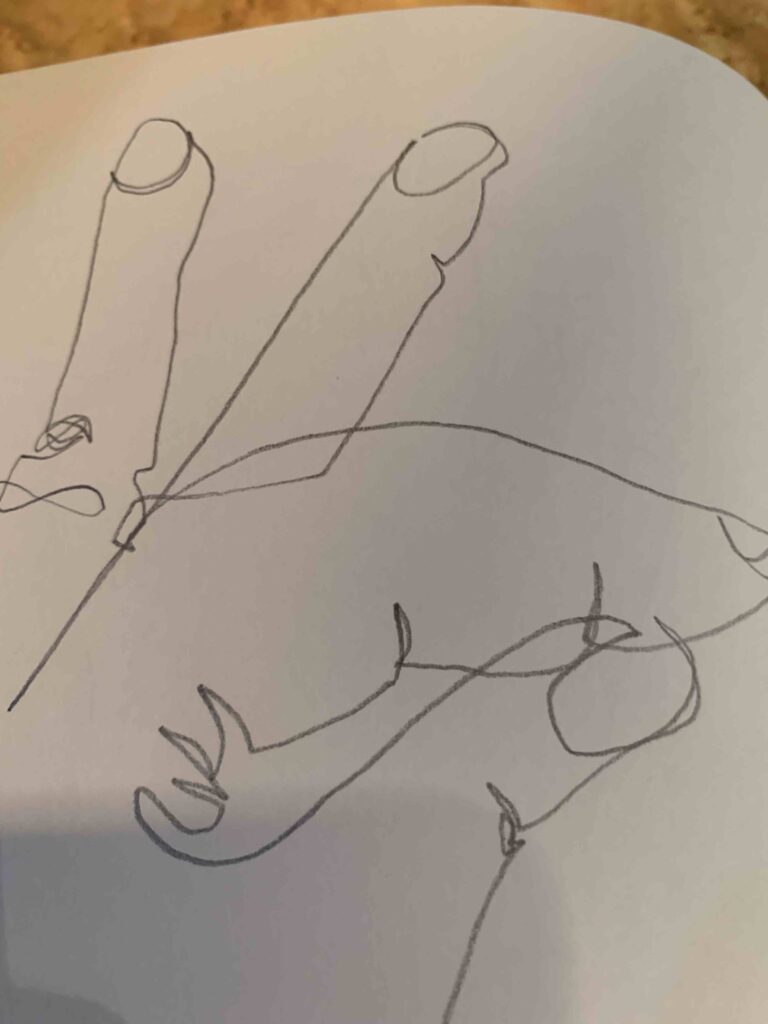
This week we will be doing Blind Contour drawings. I love these sketches because they are not supposed to be perfect, and they can be a bit fun. I played a bit before I wrote this and one of my hand drawings is hilarious – looks like a really good hitch hiker hand (big thumb).
Anyway, come and have some fun.
You will need several sheets of paper, a pencil, and even perhaps some paints (watercolour like), or pencil crayons.
Studio Tuesday – January 10th – Directed Drawing
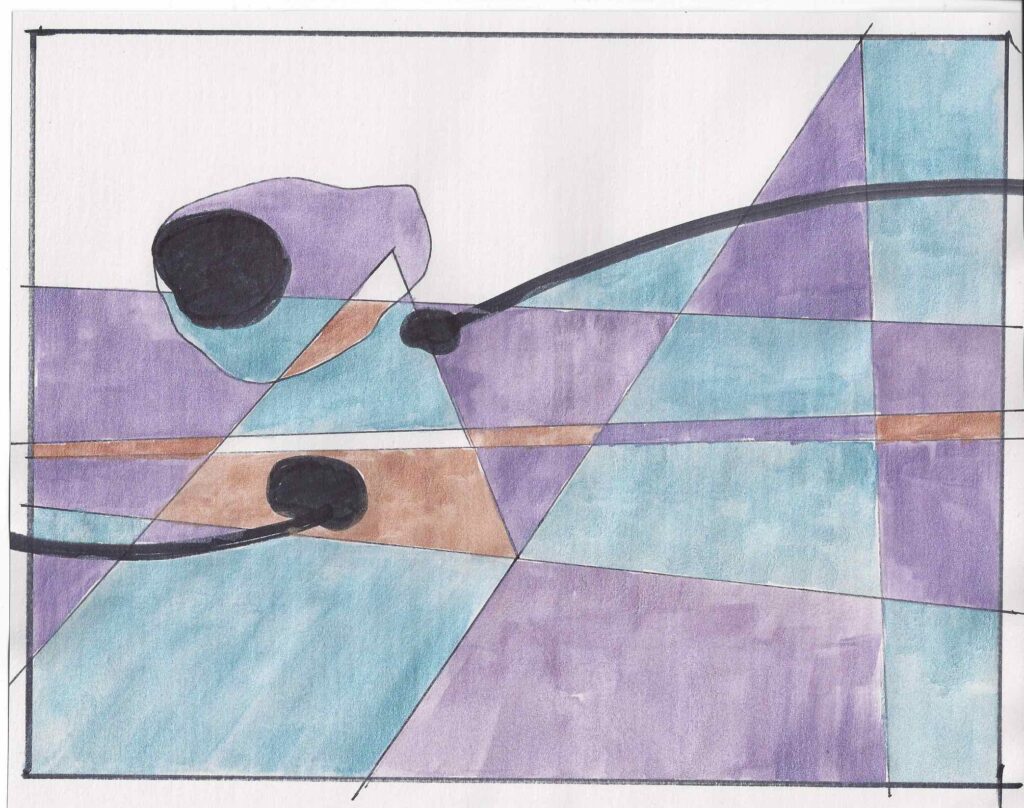
We will be doing a Directed Drawing activity this Tuesday. Exploring the five elements of contour. These end up being very simple abstract line compositions.
Supplies you will need:
Three pieces of paper or your sketchbook (Please draw a black border on each one) – see example
Sharpie marker
Fine tip marker
Coloured markers (about 5 of them)
Paint (you can use watercolour paint, or light acrylic paint – watery) – If you have a dry paint palette, that will work well too. I have one that my kids used before.
Paintbrush
Studio Tuesday – January 3rd – Drawing
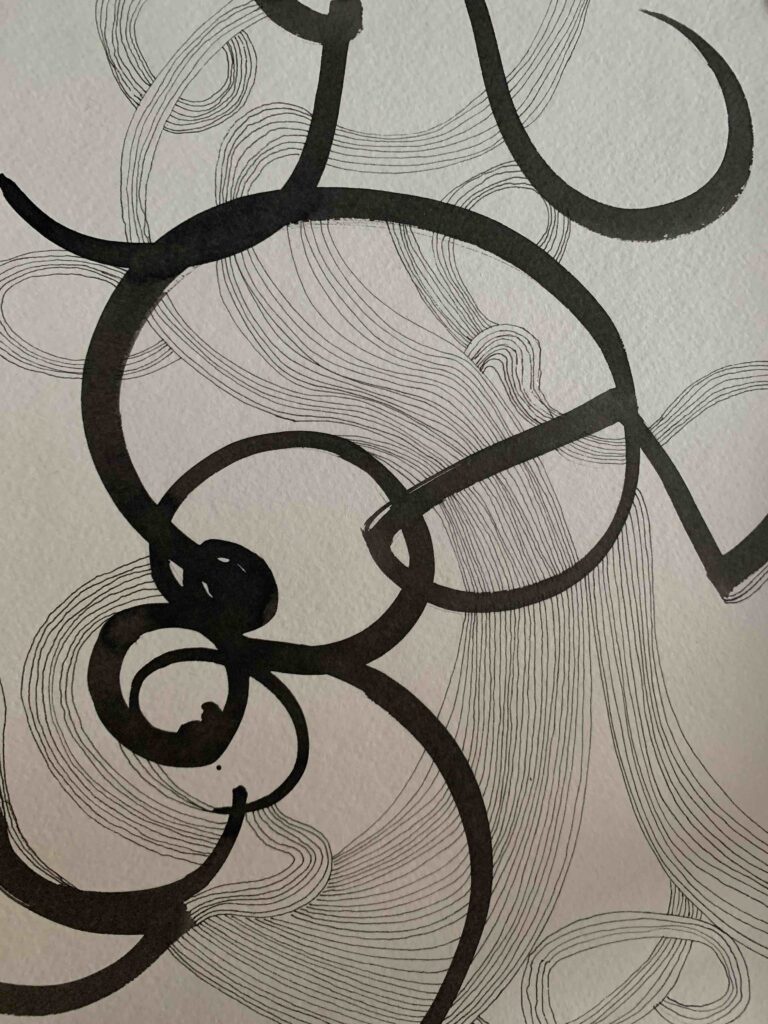
In the new year we will start off our Studio Tuesday with some drawing! We are talking about lines, lines, and more lines.
Supplies you will need
Paper (smooth is better) – I am actually also using Yupo (which I will talk about)
India Ink (liquid black)
Paint brush
Black fine tip penT
See you all Tuesday!
Karen
Studio Tuesday – December 20th – Twinchies
Okay, I did this with the seniors, and they sorta got it. We will be working on what I call Twinchies. What they are is Two inch compositions. Using all sorts of mediums. You can use bits of paper, cut up cards, embellishments, stickers, pens, drawing, doodling, pencil crayons, stamps, stamp pads, glue….what ever you feel might work.
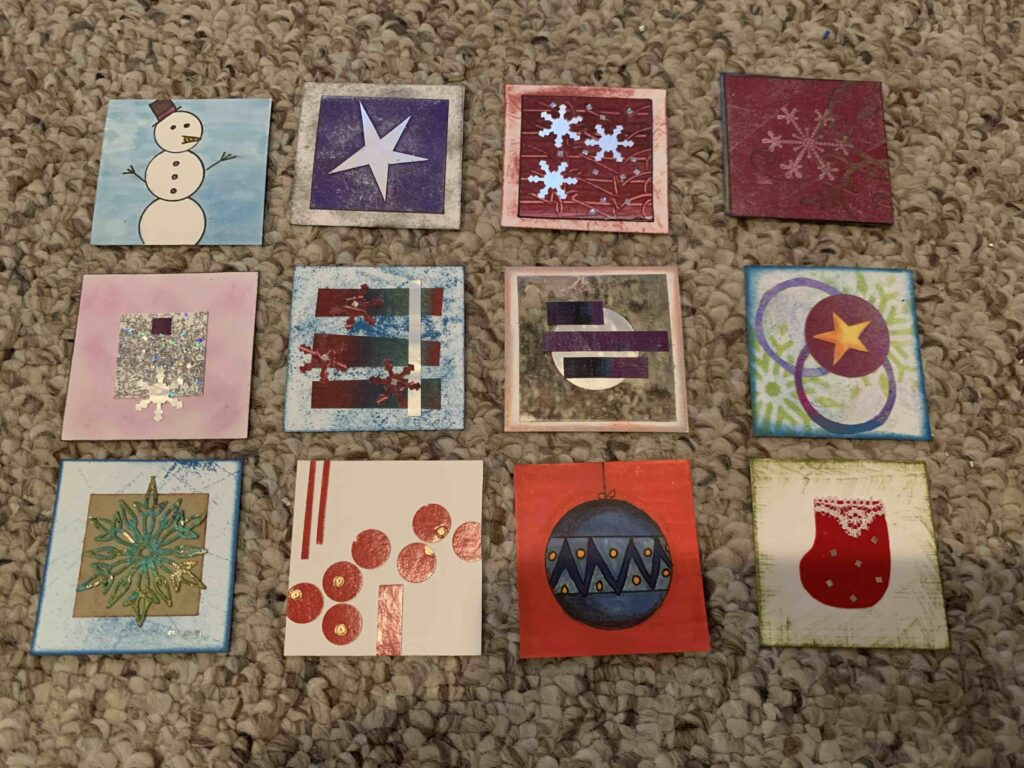
The other supplies you will need
Several little two-inch pieces of card stock – white or other colours
Glue
Scissors
Studio Tuesday – December 13th – Origami Stars Part II
Part Two of the Origami Star
Now that you’ve had a week to play around with the folds for the base components….and time to try to figure out how to put it all together….we delve into the second part. You will need 6 pieces of the same square size of paper you used for your base. (you can use a different colour, or go with the same colour).
See you Tuesday…and we’ll complete this project!
Karen
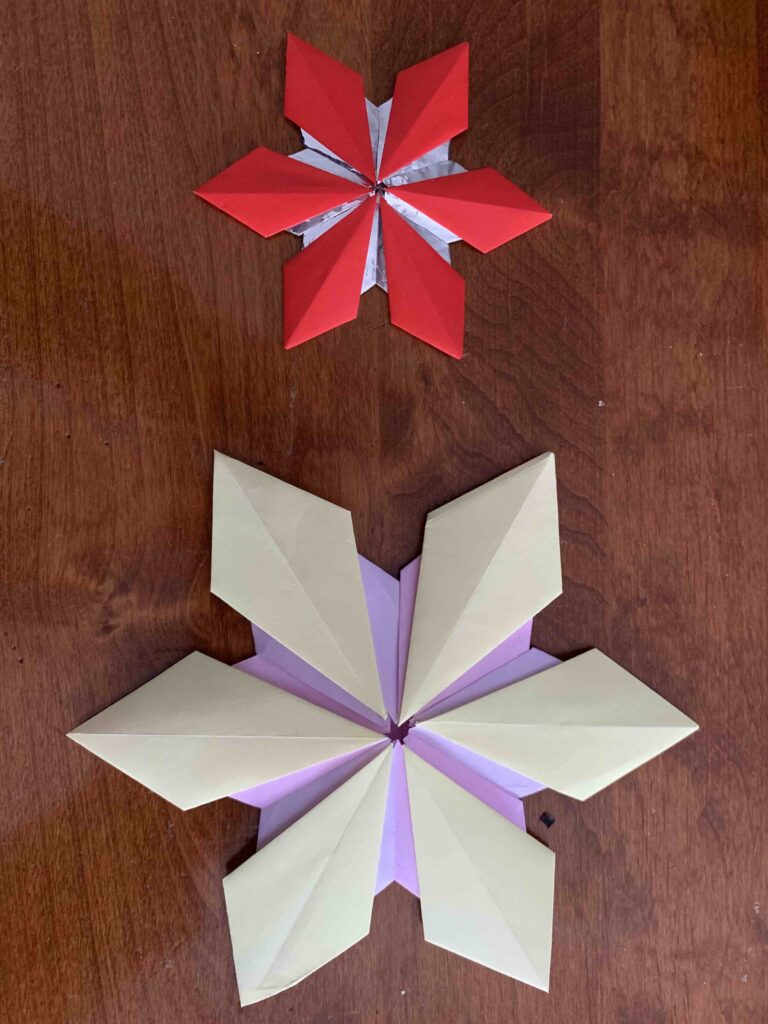
Supplies
6 squares of one colour paper, 6 squares of another colour paper (Paper could be origami, or copier paper). I would suggest 3 ½ inch or my favorite 2”. (each unit requires 12 pieces of paper, so if you want to make more than one…be prepared)
Folding bone (optional)
Bead, or sequin, or something to glue to the center of your model
String or ribbon to attach to it if you are planning on a tree decoration
Folding instructions….I have them available for you to download.
See you all Tuesday!
Karen
Studio Tuesday – December 6th – Origami Stars Part 1
Hey all, we leave November and our snowflakes behind and start our next project…Stars!
Next week we will be creating some Origami Stars. So get ready to fold.

Supplies
6 squares of one colour paper, 6 squares of another colour paper (Paper could be origami, or copier paper). I would suggest 3 ½ inch or my favorite 2”. (each unit requires 12 pieces of paper, so if you want to make more than one…be prepared)
Folding bone (optional)
Bead, or sequin, or something to glue to the center of your model
String or ribbon to attach to it if you are planning on a tree decoration
Folding instructions….I have them available for you to download.
See you all Tuesday!
Karen
Folding patterns==>Folding Patterns
Studio Tuesday – November 22nd – Flakemonth continues!
Here is our next snowflake….break out those toilet paper rolls….this is another extension on what we had done previously.
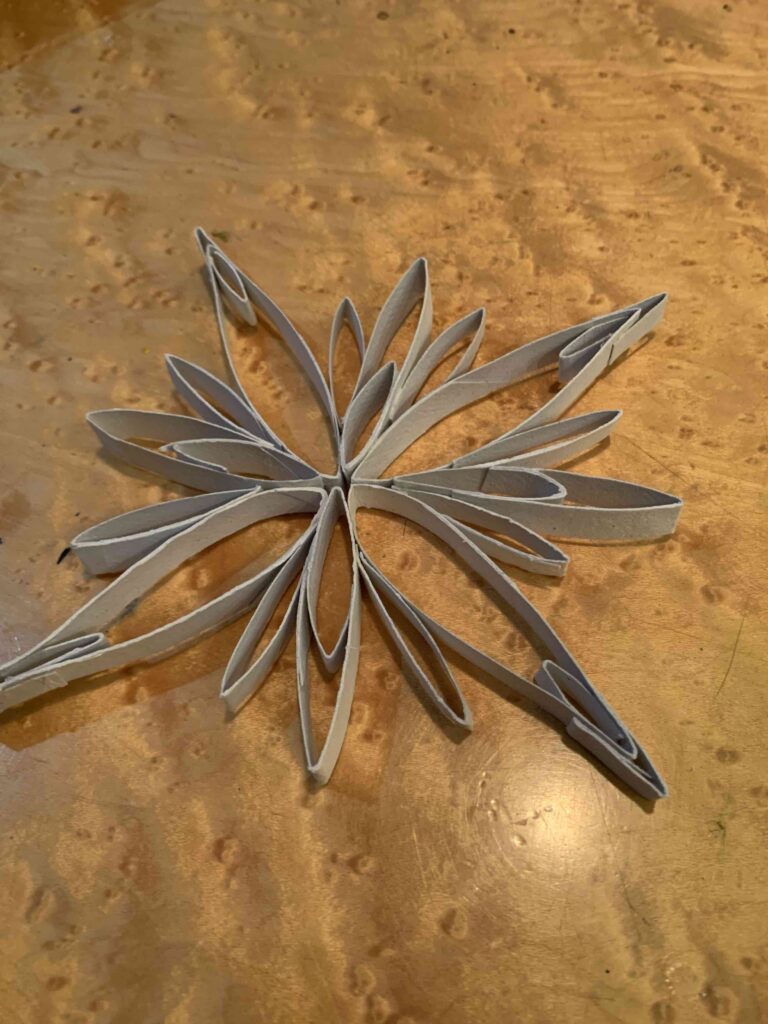
Supplies
Toilet Paper rolls
Scissors
Glue stick
Liquid glue (optional)
Tweezers
Needle or bodkin
Sparkles (optional)
See you all Tuesday
Studio Tuesday – November 15th – Three Dimensional Snowflakes!
This week we will tackle some more 3 dimensional snowflakes. More cutting and gluing needed.
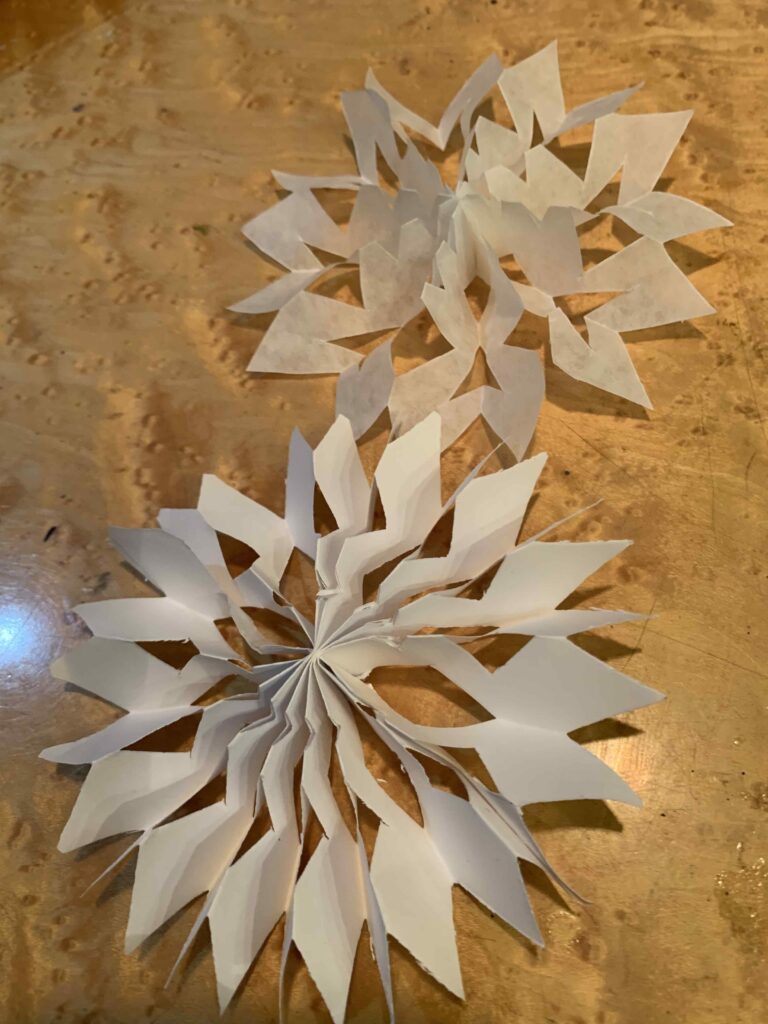
Supply List
White paper (can use sheet of regular printer paper cut in half lengthwise)
Scissors
Stapler
Glue
Pencil
**just a heads up, the following week we will be using toilet paper rolls (or paper towel rolls), so start scrounging them now so you are ready.
Snowflake cut patterns==>>SNOWFLAKE PDF PATTERNS
Have a sketchbook handy if you want to put one in there
Studio Tuesday – November 15th – Snowflakes!
This week we will be re-doing one of our previous projects from this time of year. Time to get your scissors out and cut some snowflakes!
Supplies Needed
Paper squares – either origami paper, Deli paper, or copier paper (usually about 6” x 6”)
Board Surface – could be a painted board of some sort, or you could also just have a canvas board
Paint – just a bit to cover whatever surface you want to put your snow flake on.
Scissors – you could also have a little mat knife if that might help you out.
Modgepodge – or you can use gloss gel – this is something to coat your snowflake and adhere it to the board
Protractor
Snowflake cut patterns==>>SNOWFLAKE PDF PATTERNS
Little plastic bag
Dye or ink
Have a sketchbook handy if you want to put one in there
Studio Tuesday Reruns
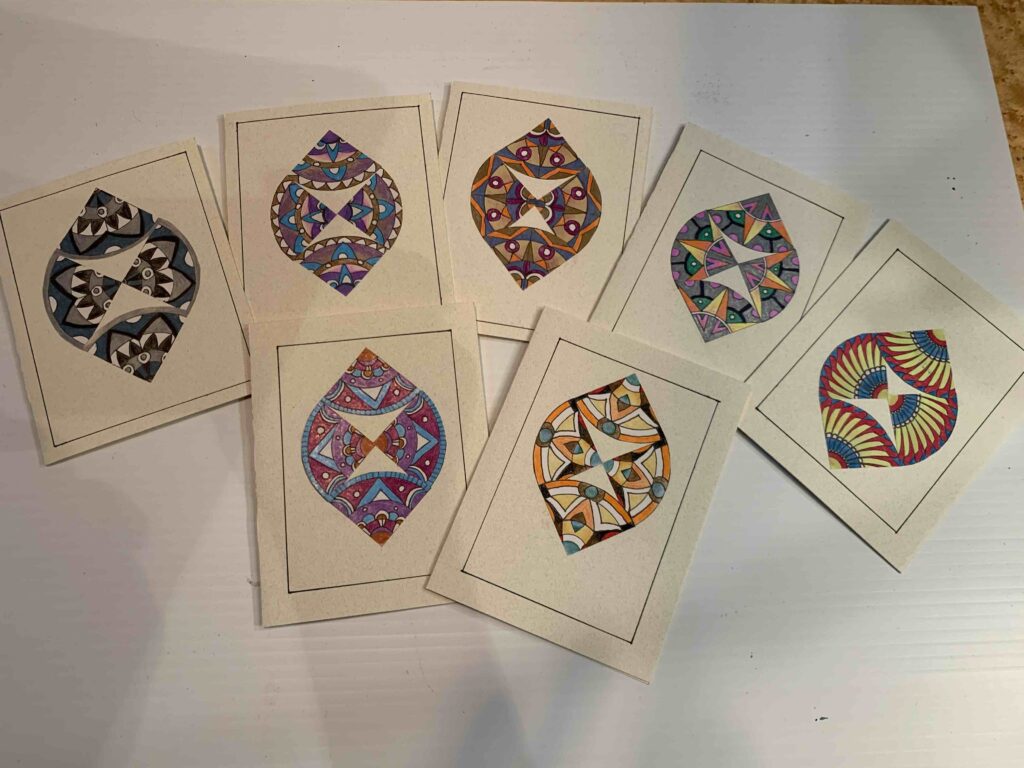
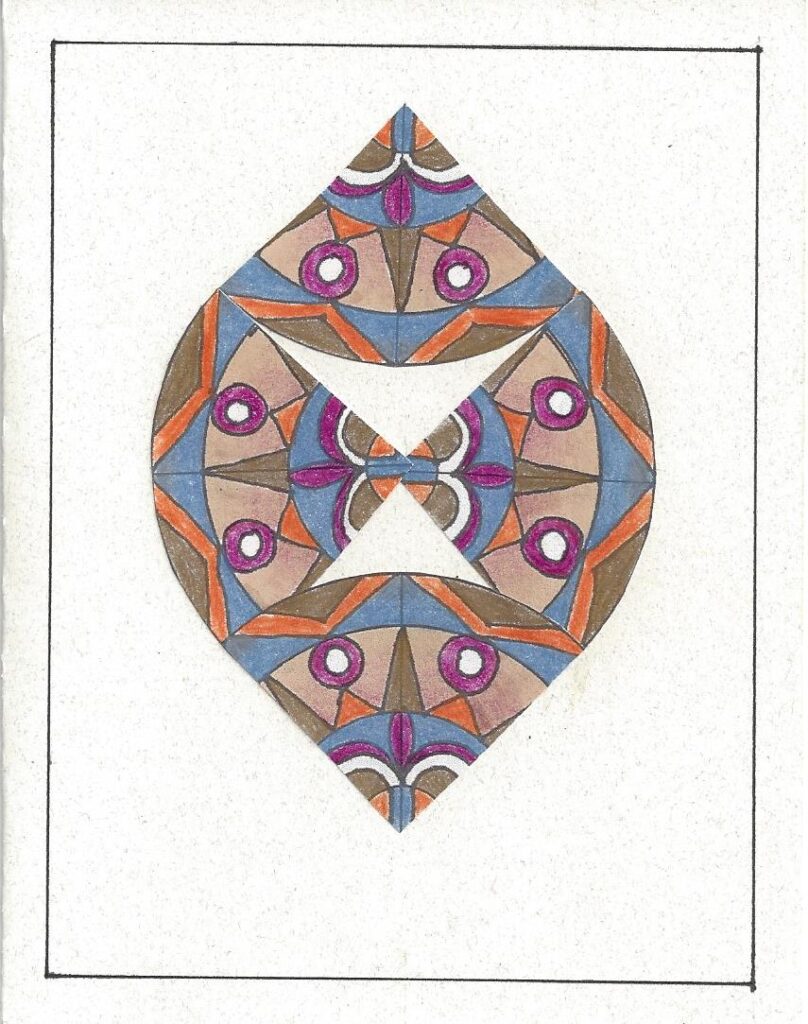
Studio Tuesday – November 7th – Radial Design Cards
Supplies Needed
Card stock (make into folded cards that measure about 4” x 5 ½”) – fit nicely into envelopes 4 ½” x 6 ½”.
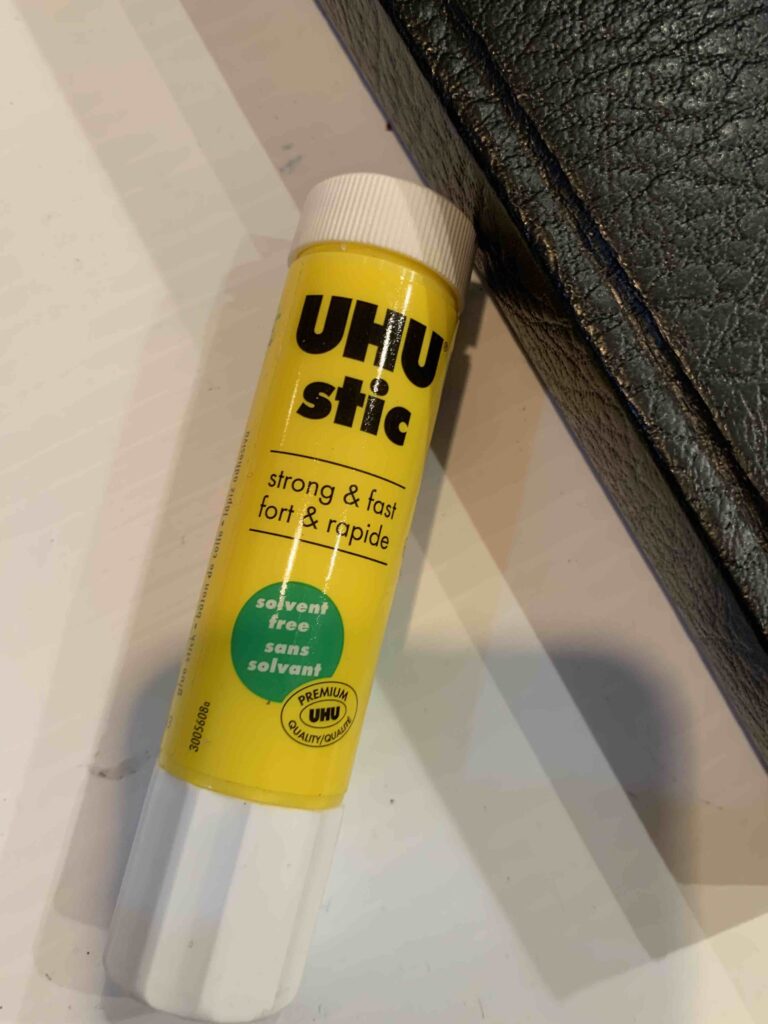
Glue stick – I like UHU.
Colour Pencils and/or markers
Fine black drawing pen
Pencil
Ruler
Sketchbook or scrap paper
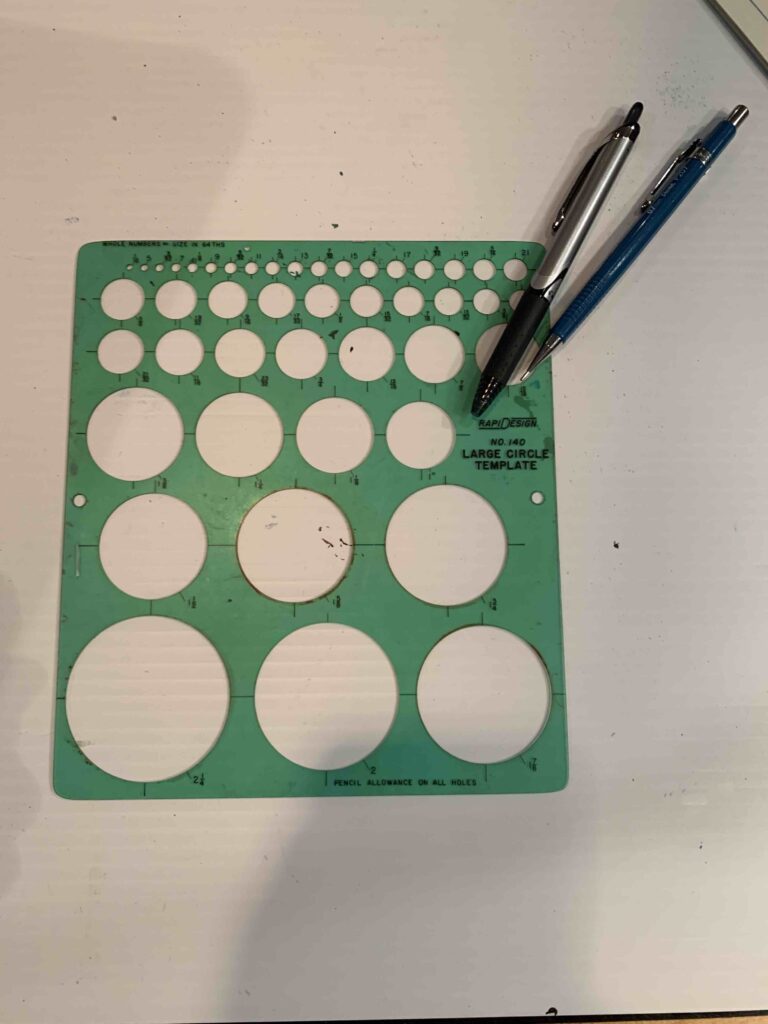
Circle template -or- Cookie cutters -or- Random things to make circles
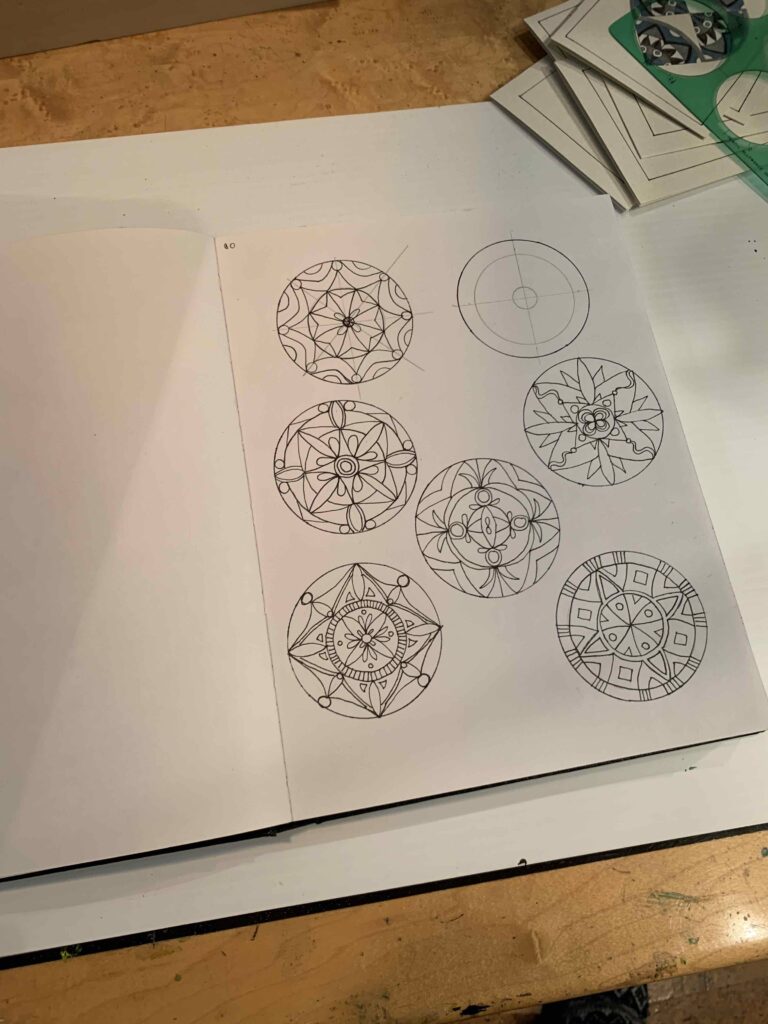
We will be creating small ‘mandallas’ (I made mine about 2 ¼” across). I actually drew up a page of them in my sketchbook, and then will scan it and print out as many as I want to colour and make into cards. You are welcome to do a few ahead of time if you like. In the class I will be going over drawing the mandalas, rendering (colouring), cutting, and assembly of the cards.
Studio Tuesday – November 1st!!!!
We’re back with some card making. This session actually overlaps with next weeks session as well so be sure to watch both!
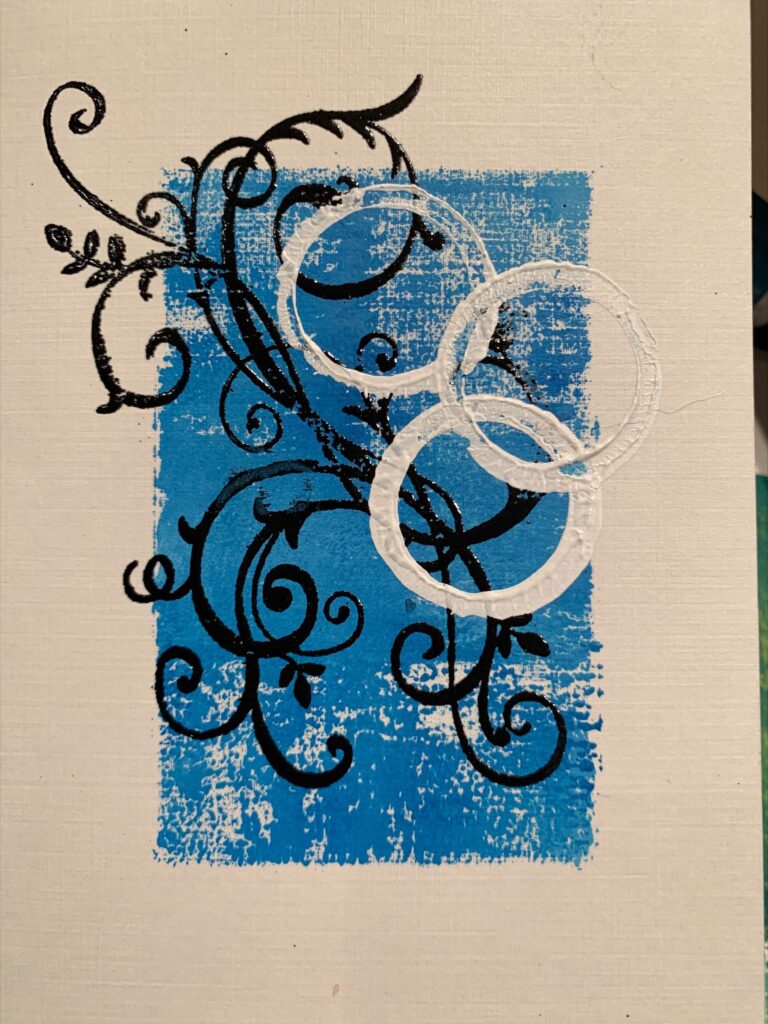
I’ve been playing around with embossing powders, and seeing how the application will work with some of my acrylic paints.
Supplies I will be working with
Rectangular stencil template
Paint
Brayer
Stamp inks
Embossing powder
Craft heat gun (or a lamp with a regular old light bulb in it)
Sheet of paper (for catching the excess powder)
Several Pieces of card stock (could be pre-folded, and ready to paint on)
Paint brushes
Studio Tuesday – July 12th
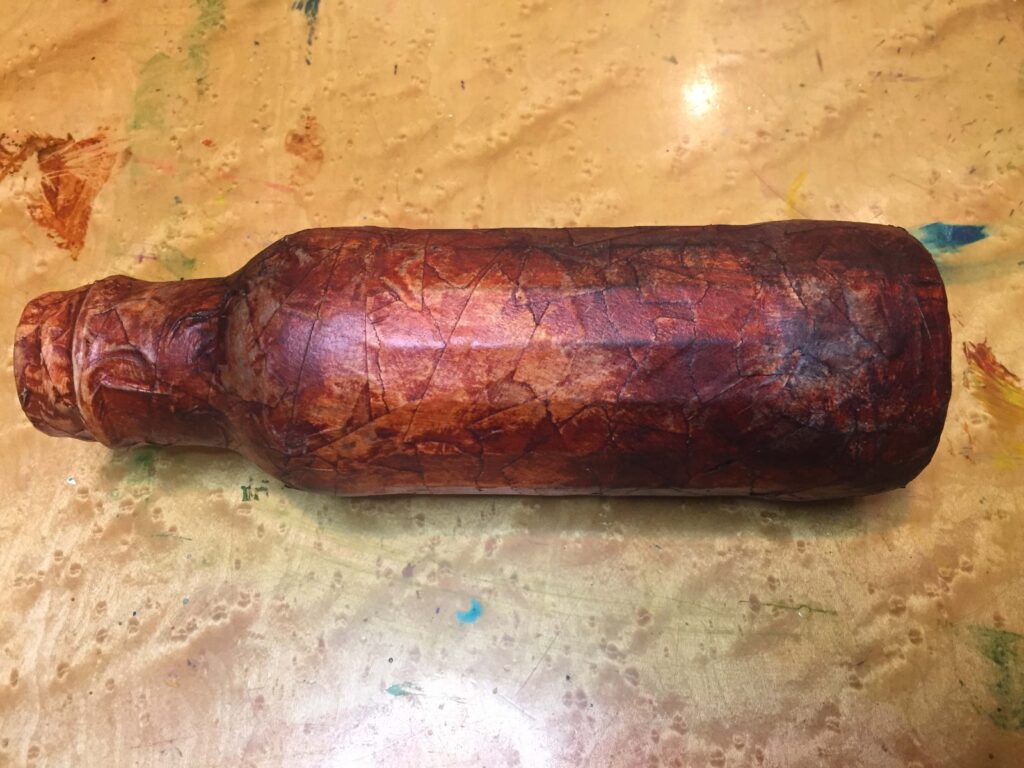
Hello, we are doing a craft this week that is a revival from when I spent time at the Leighton Centre as a child. I like to call it Leather Bottle.
Here are the supplies you will need.
- Interesting glass bottle
- Masking tape
- Brown or dark paint (or shoe polish)
- Sand paper
- Rag
See you Tuesday! Karen
Studio Tuesday – July 5th
This week we will be creating a ‘Simple Box’.
Supplies you will need….
- Card Stock (1 piece at least 12” x 8” and 1 Piece at least 5 ¼” x 7”)
- Ruler (metal)
- Pencil
- Scissors or mat knife
- Scoring Tool (folding bone, or even an old dried-up pen)
- Glue stick
We will be cutting and folding these fun little boxes. Box is about 3” square. I used white paper to create my first one….but you are welcome to use patterned or coloured card stock too.
Below you will find the hand-drawn templates I put together will all the dimensions we will be going over on Tuesday. If you click on them you will need to right click on them to either download or print them from your browser.
See you then!!
Studio Tuesday – June 28th
This week I went over some of the options for framing your work. We can have a look at your pieces you created last week and see how to go about presenting them.
I will be going over matting, frames, and different ways to present your work in a professional or nice way. I will frame a piece for you to show some of the procedures I use when putting things together for a show.
Tuesday June 21st – Directed Painting
Pulling from Elizabeth’s suggestion, I have come up with the following idea. We will be working on Four different paintings in an abstract manner.
Here are some supplies you might consider.
8 x 10 sheets of paper (or canvas board if you want)
Paint (acrylic and/or watercolour)
Collage items (interesting bits, parts from previous paintings, something commercial – newspaper, scrapbook paper, words, labels)
Modpodge or gloss gel or glue
Pencil Crayons, crayons, pastels, pens, pencil (any of these that you might have)
Water (in a tub, and in a sprayer)
Tools – (scraper like a credit card, mat knife, hole punch)
Embellishment (something bigger like a piece of metal, ribbon, or something to attach to your work) might need a stronger adhesive for this.
Stamps (like any of the ones we have made before)
You will need paint brushes of various sizes, a rag, and another mark making tool.
If you have any other things that you want to have handy, that might be fun too.
Tuesday June 14th – Zendoodles
So tonight we will be doing something simple…Zendoodles.
If you have some paper or your sketchbook, and then some nice black pens (of course you are welcome to bring in some colour if you like).
You can refer to my zendoodle example sheets below. I thought we could do a drawing and then doodle through it.
Pentel Rollerball Pen – Black
Sketchbook for notes, ideas and all kinds of tidbits.
Zendoodle 1 – click to open and print
Zendoodle 2 – click to open and print
Zendoodle 3 – click to open and print
Zendoodle 4 – click to open and print
Zendoodle 5 – click to open and print
Zendoodle 6 – click to open and print
Zendoodle 7 – click to open and print
Tuesday June 7th – Sketchbooks – Storytelling
This week we will be working mostly in our sketchbooks. I want to play with story telling in an Egyptian way.
You will need a ruler, pens, (paper if you don’t have a sketchbook). Markers and pencil crayons. Get ready to tell a story. I like showing just a normal day in my life….so come and have fun with me.
Tuesday May 31st – Origami
It’s time to get folding!
This week we’re folding paper to create this unique item.
This really involves a lot of folding but it’s well worth it when you see the final product.
Supplies you will need this week
Lots of paper 4 x 4″ sheets approximately 24 plus
Optional – folding bone, used to improve folds
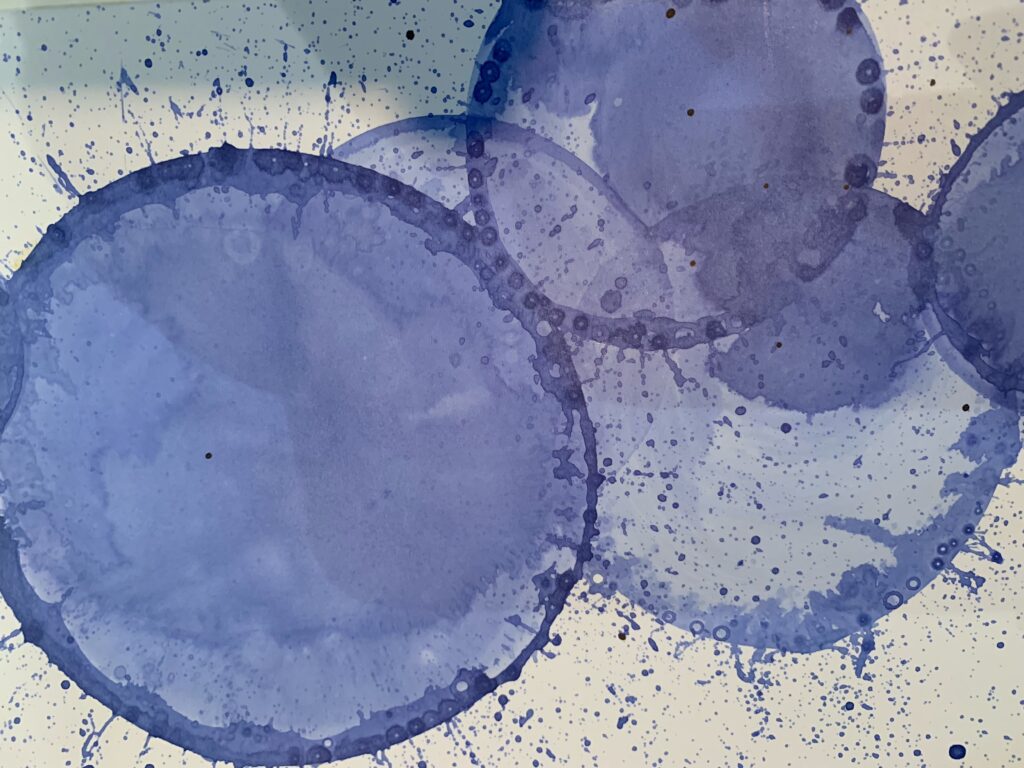
Tuesday May 24th – Bubble Painting
Okay, we got messy! Oh boy!
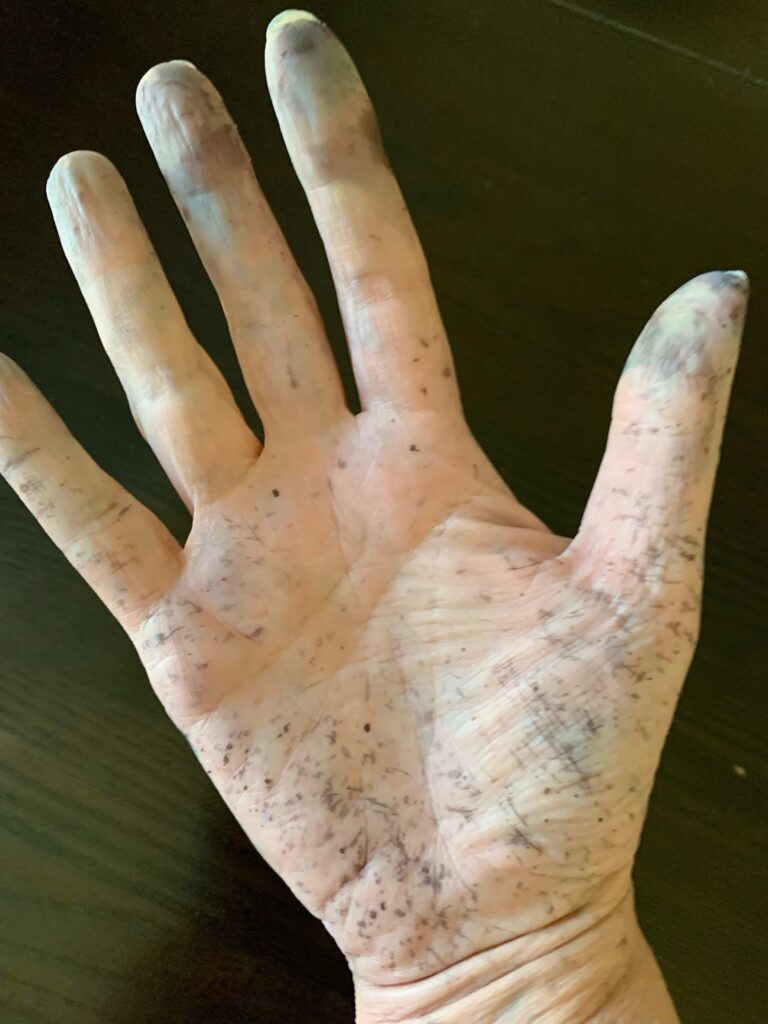
This session we explored Bubble Painting!
Make sure you have lots of newspaper around your work area (often the bubbles overflow the container, so you might also have some plastic set down), and wear clothes that are okay to get dirty.
Supplies you will need this week
Bubble blowing liquid, or dish soap
Acrylic paint, or ink (not alcohol ink)
A few shallow dishes so you can mix several colours
A straw or two
A metal spoon
Lots of paper
Maybe a rag close by to wipe up…..I’ve tried several ways to do this and have come up with the best possible applications.
Tuesday April 26th – Paper Mache Shakers – Part 1 & 2 & 3
Okay, we are back again with a project that we will take place over the next few weeks.
Paper Mache’ Shakers…..
Supplies you will need this week
Burned out light bulbs (old style….not LED)
A stick, or handle of some sort (you can use another light bulb if you want)
Masking tape
News print or news paper (thinner scrap paper)
Paper Mache’ – I make it with flour and water (boil water, and add flour until you get a paste…careful, because it thickens quickly)
Supplies you will need for the 2nd week
You will need the newsprint, and paper mache’ again.
Hammer
Sand paper
Supplies you will need for the 3rd week – Time to paint
Sand paper
Paint (various colours)
Painting tools, brushes, stamps, dotters
Clear coating (Mod Podge, or I like to use Minwax Polycrylic – from Lowes)
Week 1
Week 2
Week 3
Week 4, Show off time
Tuesday April 12th – Weaving
Well, coming back into the world…..and let’s continue with our weaving project. Bring your pre-painted papers. You will need scissors, glue, perhaps a bottom paper to mount your weaving on. I like having some pre-cut mats the help display the finished pieces
Supplies
The supplies you’ll need for this week’s Studio Tuesday are listed below and don’t forget your trusty Sketchbook:
Here’s the list:
Scissors
Glue
Paper to mount weaving on
Tuesday March 29th, 2022 – For the Birds!
Hey, this week we’ll be painting birdhouses!
You can pick them up at Michaels, just be sure to use one of the 30% off coupons you can get from either their bailouts or the app. they’re pretty affordable and you can find them int he wood area?!?!
We’ll just be playing with paint so you’ll need a brush or two and some paints to come have relaxing hour.
Supplies
The supplies you’ll need for this week’s Studio Tuesday are listed below and don’t forget your trusty Sketchbook:
Here’s the list
Birdhouse. (this part is important)
Paint Brushes
Paints
Tuesday March 22nd, 2022 – Radial Design
Hi all! I’ve been busy in my studio working on all the Gelli Print stuff I did on Tuesday. Now I have a nice collection of little paintings for my upcoming shows…..now it’s just framing and stuff.
This coming Tuesday I wanted to do a little project with you that I call Radial Design. It takes a little bit of the zendoodle stuff we did before and incorporates it into a fun little project. This is what you will need….
Circles of paper….I like them about 5 inches diameter….now the paper could be white….or you could do some coloured paper too. If you’re not sure how to get the circle, you could use a CD to trace out a circle and then cut it out.
Supplies
The supplies you’ll need for this week’s Studio Tuesday are listed below and don’t forget your trusty Sketchbook:
Here’s the list
Scissors
Coloured Markers and Pencil Crayons
Black Pen
Paper to mount finished product if not using a sketchbook (which would require glue as well..)
We can take these pieces and apply them to card stock to make more greeting cards, or just turn it into a new piece of artwork.
Tuesday March 15th, 2022 – Gelli Plate Demo
This week I’m playing with a Gelli Plate. My sister was visiting me and we will be making mono prints using all types of tools in my studio. Now you don’t have to go out and purchase your own, but maybe after watching the demo you’ll want to! They are about $25 at Michaels, (but you can use a 30% coupon to take it down to about 19).
The supplies you’ll need for this week’s Studio Tuesday are listed below and don’t forget your trusty Sketchbook:
Here’s the list
Gelli Plate (5″ x 7″ is what we used, but you can go bigger!)
Paints, paper and stencils
We can take these pieces and apply them to card stock to make more greeting cards, or just turn it into a new piece of artwork.
Tuesday March 8th, 2022 – Old Photos
This week we will be taking old photographs and making them into art work….we will be scratching in, painting or drawing on top, really just using the photographs as another surface to create work on. Make sure the pictures you are playing with are ones that you don’t want…and are on photo paper….like the kind we got developed in the old days.
Supplies
The supplies you’ll need for this week’s Studio Tuesday are listed below and don’t forget your trusty Sketchbook:
Here’s the list
Sharp needle
Knife blades
Sand paper
Steel wool *this part is very cool!
Paint, markers, pencil crayons, pens
We can take these pieces and apply them to card stock to make more greeting cards, or just turn it into a new piece of artwork.
Tuesday February 15th Embellish Your Pet
Tuesday February 22nd Op Art
Tuesday February 8th, 2022 – Zendoodles
This session we did Zendoodles! This is the art of doodling that has been copyrighted as Zentangles, but what the heck it’s just doodling to me.
All you’ll need this session is your sketchbook (or some paper, but why not put it in a sketchbook!) and a good pen preferably black. Many people like using the Micron Pens, but my fav is the Pentel Rollerball pens.
We’ll spend the majority of the hour doodling which may sound boring, but I’ve found it becomes extremely relaxing, I can’t wait to hear how you enjoy it!
If you do have a circle shape, maybe like an old CD that you can use to trace it will just make some aspects a bit easier. You’ll also find a list of my Zendoodle designs you can download and print off in the supply list below. So let’s get doodling!
Supplies
The supplies you’ll need for this week’s Studio Tuesday are pretty minimal and are listed at the top this time, but don’t forget your trusty Sketchbook:
Pentel Rollerball Pen – Black
Sketchbook for notes, ideas and all kinds of tidbits.
Zendoodle 1 – click to open and print
Zendoodle 2 – click to open and print
Zendoodle 3 – click to open and print
Zendoodle 4 – click to open and print
Zendoodle 5 – click to open and print
Zendoodle 6 – click to open and print
Zendoodle 7 – click to open and print
Tuesday February 1st, 2022 – Toilet Paper Roll Craft Project
Okay, time to get a bit crafty.
We are going to use those toilet paper rolls you’ve been saving (or paper towel rolls).
This is what you will need.
Toilet paper rolls
Scissors
Wax paper
Modpodge
Sparkles, or glittery things, or bits that you might want play with.
Maybe a ribbon or string
White glue
Supplies
The supplies you’ll need for this week’s Studio Tuesday are pretty minimal and are listed at the top this time, but don’t forget your trusty Sketchbook:
Sketchbook for notes, ideas and all kinds of tidbits.
**Note – It’s not necessary to purchase any of these supplies if you already have them or similar products. However if you do use our links we get a tiny commission for the purchase which we’ll use to help support this ongoing project. These commissions will help us cover costs for the paid Zoom account, hosting and equipment so thank you for your support!
Tuesday January 25th – Tool Day!
Not too sure what to suggest for the upcoming week. I will be showing off some of my hand made tools, so if you have any of your own, you are welcome to show them. Or if you have some junk that you think could become tools, then you are welcome to bring them as well.
A few of the things I will show you will be the collection of handles I have, and some of the things I do to turn those handles into tools. You’ll learn how you can repurpose simple items to become tools.
When I am putting these together sometimes I use a hot glue gun or more often I use a much stronger glue, and I will explain all that. If you want to play along, bring your paints, and the pieces you have been working on so you have a place to play.
Supplies
The supplies you’ll need for this week’s Studio Tuesday are pretty minimal. Really you can just use the items you brought last week, or if you haven’t picked up anything the info from last week is below:
Acrylic Paint (not dollar store, but it doesn’t have to be professional quality either, 3-4 colours)
Paint Brushes – a stiffer paintbrush is better for this
Small Sponge
Stencils or anything interesting to paint through, like mesh or netting
Sketchbook to mount pieces to or alternatively additional paper or a board to mount some pieces to.
Your pieces and board you created last week
**Note – It’s not necessary to purchase any of these supplies if you already have them or similar products. However if you do use our links we get a tiny commission for the purchase which we’ll use to help support this ongoing project. These commissions will help us cover costs for the paid Zoom account, hosting and equipment so thank you for your support!
Tuesday January 18th – Making Your Own Stencils
In this session we’ll be taking a look at stencils, how I use them and how you can make your own to create unique effects on your pieces or in your craftwork!
I use stencils in my art for spray painting, to create lines and/or patterns with acrylic paints and to create interesting effects.
I will go over some of the things you should know about stencils along with how I make many of my own stencils. As mentioned I do use them with spray paint, so I will be using spray paint in this session to illustrate how that works, but you’re not required to use spray paints with me (unless you wanna…).
I’ll also share how you can use stencils with a sponge or brush if paint is more your medium of choice.
For this session you’ll once again need your paper or canvas boards we’ve been working on and you can check out the supplies list at the bottom for additional items.
Supplies
The supplies you’ll need for this weeks Studio Tuesday include the following:
Acrylic Paint (not dollar store, but it doesn’t have to be professional quality either, 3-4 colours)
Paint Brushes – a stiffer paintbrush is better for this
Small Sponge
Stencils or anything interesting to paint through, like mesh or netting
Sketchbook to mount pieces to or alternatively additional paper or a board to mount some pieces to.
Your pieces and board you created last week
Do it yourself stencils
If you want to make some of your own you can use Overhead projector sheets, or any thin plastic sheets, a sharpie marker, mat knife and cutting board and I’ll walk you through the process as part of the session!
**Note – It’s not necessary to purchase any of these supplies if you already have them or similar products. However if you do use our links we get a tiny commission for the purchase which we’ll use to help support this ongoing project. These commissions will help us cover costs for the paid Zoom account, hosting and equipment so thank you for your support!
Tuesday January 11th – Abstract Painting II
Well the first Abstract night was so much fun I had to do part II! And this involves using some of the pieces we created last week.
We’ll be taking our paper pieces (and board) and continuing on with them to the next stage where we’ll be applying additional elements like paper, fabric, book pages, old stamps, coffee filters, tea bags and more.
If you missed last week’s episode you’ll want to go watch it and catch up, you can find the link at the bottom of this page or pop over to https://KarenBiko.com/reruns to find all the previous sessions. In there I talk about the “enhancements” we will be adding as well so listen in so you are prepared.
Supplies
The supplies you’ll need for this weeks Studio Tuesday include the following:
Scissors and/or
Cutting Mat & Knife
Acrylic Paint (not dollar store, but it doesn’t have to be professional quality either, 3-4 colours)
ModgePodge or Gloss Gel
Paint Brushes – ideally half inch to one inch wide flat plus smaller
Sketchbook to mount pieces to or alternatively additional paper or a board to mount some pieces to.
Your pieces and board you created last week
Your selection of special decorative items (decorative paper, book pages, light fabrics, old tea bags…)
**Note – It’s not necessary to purchase any of these supplies if you already have them or similar products. However if you do use our links we get a tiny commission for the purchase which we’ll use to help support this ongoing project. These commissions will help us cover costs for the paid Zoom account, hosting and equipment so thank you for your support!
Tuesday January 4th – Abstract Painting
Well happy 2022 to everyone! For the first session of 2022 we’re going to be doing abstract painting. We will just have some fun mixing colours on paper and then doing a few projects from that moving forward.
For this session we’ll be painting and cutting, creating a visual design with the pieces. But, we will be painting several sheets of the cardstock so that we will have it ready to go in the following weeks.
The next few sessions will build on these lessons and I will go into some fun additions like adding collage elements, making your own tools and your own stencils as well!
Studio Tuesday Zoom link
Supplies
The supplies you’ll need for this weeks Studio Tuesday include the following:
Scissors and/or
Cutting Mat & Knife
Acrylic Paint (not dollar store, but it doesn’t have to be professional quality either, 3-4 colours)
Card Stock (we want a thicker paper to paint on that doesn’t ripple, it doesn’t have to be the expensive stuff!)
Small Square or Rectangle of Paper (coloured or black or even white!)
Glue Stick
Paint Brushes – ideally half inch to one inch wide flat plus smaller
Sketchbook to mount pieces to or alternatively additional paper or a board to mount some pieces to.
Canvas Board – bonus item and not necessary but I will touch on this as well
**Note – It’s not necessary to purchase any of these supplies if you already have them or similar products. However if you do use our links we get a tiny commission for the purchase which we’ll use to help support this ongoing project. These commissions will help us cover costs for the paid Zoom account, hosting and equipment so thank you for your support!
Tuesday December 28th – The Notan Project
This week’s project was Notan! Notan is the Japanese term literally meaning light and dark harmony and we’ll playing with shapes for the evening creating interesting compositions.
I’ll be using black paper, but you can also use any colour you want (or have lying about).
As always, have your sketchbook handy just in case you need to jot down ideas!
Supplies
The supplies you’ll need for this weeks Studio Tuesday include the following:
Scissors and/or
Cutting Mat & Knife
Small Square or Rectangle of Paper (coloured or black or even white!)
Glue Stick
Surface to glue onto, another piece of paper, or mat or your
Sketchbook
Wax paper or parchment paper
Tuesday December 21st – The Sketchbook Chat
This week’s project was the Sketchbook chat. I explained my process for sketchbooks, ran through a quick tour through several of my sketchbooks and then we jumped into a sketchbook exercise at the end.
If you are interested in working in sketchbooks, have one ready during the sessions or when watching the videos as you never know what we might get to add to them, or after this session how you might use them to expand your sketchbook journey!
Supplies
The supplies you’ll need for this weeks Studio Tuesday include the following:
Sketchbook
Pencil Crayons
Black Drawing Pencil
Square Template – Can be created out of cardboard, 2″ x 2″ hole
**Note – It’s not necessary to purchase any of these supplies if you already have them or similar products. However if you do use our links we get a tiny commission for the purchase which we’ll use to help support this ongoing project. These commissions will help us cover costs for the paid Zoom account, hosting and equipment so thank you for your support!
December 14th, 2021 – The Snowflake Project
With winter comes snowflakes and with our next project also comes snowflakes!
I have a link below for you to download my snowflake patterns which will be very handy to have (ok you have to download and print this off) along with a list of supplies that will be handy below the meeting link.
So get excited, come join us and let’s get creating!
Supplies
The supplies you’ll need for this weeks Studio Tuesday include the following:
Origami Paper or Deli Paper – 6″ Square
Canvas Board – again 6″ x 6″
Gesso (Liquitex recommended)
Acrylic Paint
Gloss Gel or Modge Podge
Scissors
Paint Brushes
Downloadable Snowflake Patterns – Snowflake Pattern PDF
**Note – It’s not necessary to purchase any of these supplies if you already have them or similar products. However if you do use our links we get a tiny commission for the purchase which we’ll use to help support this ongoing project. These commissions will help us cover costs for the paid Zoom account, hosting and equipment so thank you for your support!
December 7th, 2021 – Recycled Christmas Cards Project
In this session we’ll be taking old Christmas cards (or Christmas wrapping paper, Christmas flyers, just about anything Christmassy you may have about) and turning them into new Christmas cards.
While the theme of the project is Christmas based you can do this with any cards from birthday to Valentines and anything else along the way. I go over that at the beginning and you can see how you can take these new skills we teach you to other card projects.
Here’s your list of supplies you will want to have handy and the video is just below (please be aware most of the links below provide us with a small commission if you purchase through them. Those commissions help us pay for supplies, equipment to record and share the videos and more, so thank you if you use them and thank if you simply watch the videos!)
Last Year’s Christmas Cards (or new ones, or Christmas wrapping, Christmas flyers or something paper based with Christmas!)
Black Pen – Uni-ball Black Fine Roller Ball Pen
Card Stock or heavy paper – 50 pack Card Stock White
Glue Sticks – UHU Glue Sticks
Craft Cutting Mat – Self Healing 12″ x 18″ Craft Mat
Mat Knife – Hobby Knife Kit
Fiskars 12″ Paper trimmer
November 30th, 2021 – Zendoodle Christmas Card Ornaments
Our Studio Tuesday Rerun for November 30th was the Zendoodle Christmas Card Ornament project where we created little art pieces we can use for Christmas cards, as ornaments on your tree or for the basis of a myriad of other projects or events! You’ll find the video below the sample images down below.


Studio Tuesday Reruns Supplies
The supplies we used this week include the following:
Pencil crayons – We use Prismacolor Pencil Crayons
Markers – COPIC Sketch Markers
Black Pen – Uni-ball Black Fine Roller Ball Pen
Card Stock or heavy paper – 50 pack Card Stock White
Circle Template – Drafting Circle Template – You can use a small glass, teacup or just about anything to make your own circles, the template just gives you more options and consistency!
Paper Cutter – Fiskars Paper Cutter
Art Tools – Silicone Tipped Art Tools
Glue Sticks – UHU Glue Sticks
**Note – You don’t HAVE to use these specific items (although I don’t know how anyone can live without a Fiskars Paper Cutter..), it’s just a list of items I use or similar items to the ones I use and have had success with. Also note these are affiliate links so any purchases you make through them help support Studio Tuesday and we appreciate it!
Upcoming Studio Tuesday
Tired of reruns and want to check out the upcoming Studio Tuesday event? You can find the link for the next Studio Tuesday project along with the supplies required here, KarenBiko.com/Studio-Tuesday

